
Eclipse IDE
Setting up Eclipse IDE for Java
The Eclipse IDE for Java Developers application is required to compile the Java and stub files, and run the script files.
To setup Eclipse IDE:
-
Launch Eclipse IDE.
-
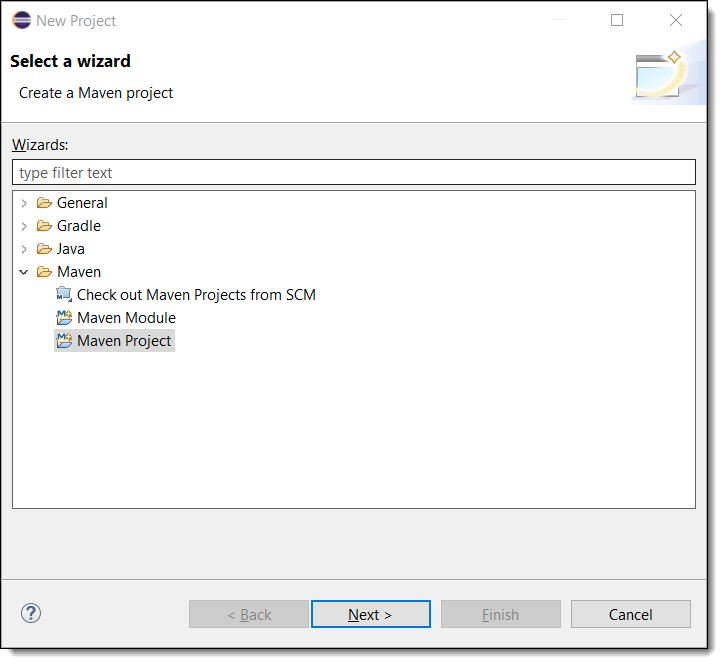
Navigate to File > New > Project….The New Project window opens.
-
Click Maven > MavenProject to create a new Maven Project. Click Next >.
-
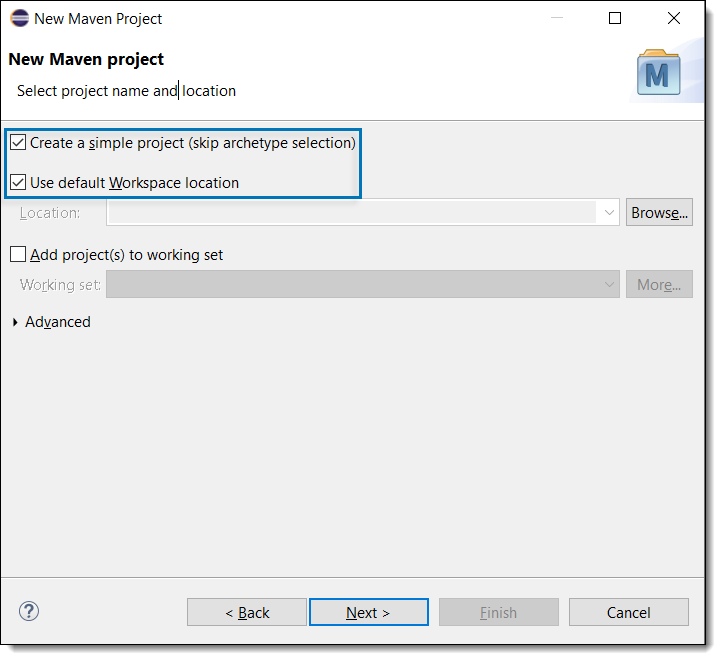
Make sure the Create a simple project (skip archetype selection) and Use default Workspace location checkboxes are enabled, as shown below. Click Next >.
-
Enter the details. Click Finish.
Your Maven project (e.g., test) is created successfully.
-
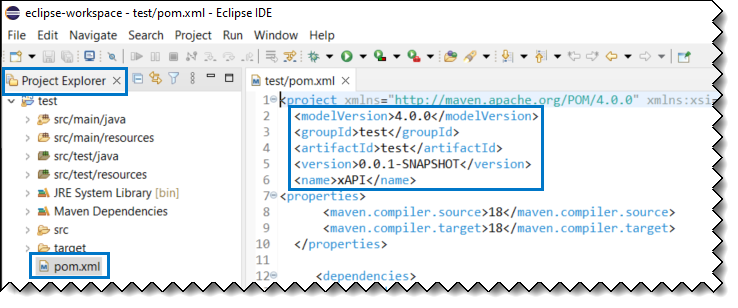
Navigate to Package Explorer > test > pom.xml. Open the pom.xml file. Verify if the modelVersion, groupId, artifactId, version, and name are the same that were used in step 5.
-
To add the gRPC and maven plugin dependencies to your pom.xml file, refer the code below. Copy and paste it into your pom.xml file.
    -<properties>
        <maven.compiler.source>18</maven.compiler.source>
        <maven.compiler.target>18</maven.compiler.target>
    </properties>
    -<dependencies>
        -<dependency>
            <groupId>io.grpc</groupId>
            <artifactId>grpc-netty-shaded</artifactId>
            <version>1.46.0</version>
            <scope>compile</scope>
        </dependency>
        -<dependency>
            <groupId>io.grpc</groupId>
            <artifactId>grpc-protobuf</artifactId>
            <version>1.46.0</version>
        </dependency>
        -<dependency>
            <groupId>io.grpc</groupId>
            <artifactId>grpc-stub</artifactId>
            <version>1.46.0</version>
        </dependency>
        -<dependency>
                <!-- necessary for Java 9+ -->
            <groupId>org.apache.tomcat</groupId>
            <artifactId>annotations-api</artifactId>
            <version>6.0.53</version>
            <scope>provided</scope>
        </dependency>
        -<dependency>
            <groupId>javax.annotation</groupId>
            <artifactId>javax.annotation-api</artifactId>
            <version>1.3.2</version>
        </dependency>
        </dependencies>
    -<build>
        -<extensions>
            -<extension>
                <groupId>kr.motd.maven</groupId>
                <artifactId>os-maven-plugin</artifactId>
                <version>1.6.2</version>
            </extension>
        </extensions>
        -<plugins>
            -<plugin>
                <groupId>org.xolstice.maven.plugins</groupId>
                <artifactId>protobuf-maven-plugin</artifactId>
                <version>0.6.1</version>
            </plugin>
        </plugins>
    </build>
</project>-
Right-click test (Package Explorer > test) select Maven > Update Project…. Click OK.
-
Create a new folder to store the Java (protobuf) files by navigating to Package Explorer > test, then right-click src\main\java, click New > Folder. The New Folder window appears.
-
Enter a name in the Folder name field (e.g., xapi).
-
Copy and paste the files that are generated after Compiling Protobuf files to this folder.
-
-
Create a new folder to store the scripts by navigating to Package Explorer > test, then right-click src\main\java > New > Folder. The New Folder window appears.
-
Enter a name in the Folder name field (e.g., scripts).
-
Copy and paste the script files to this folder.
-
Note: Contact your SS&C Eze client service representative for script files.
You have setup the Eclipse IDE project successfully for Java.
Running the Script in Eclipse IDE
Verify Java Version and Linking
To verify Java link in Eclipse IDE:
-
Launch Eclipse IDE.
-
Navigate to Package Explorer > right-click test > Properties. The Properties for test window opens.
-
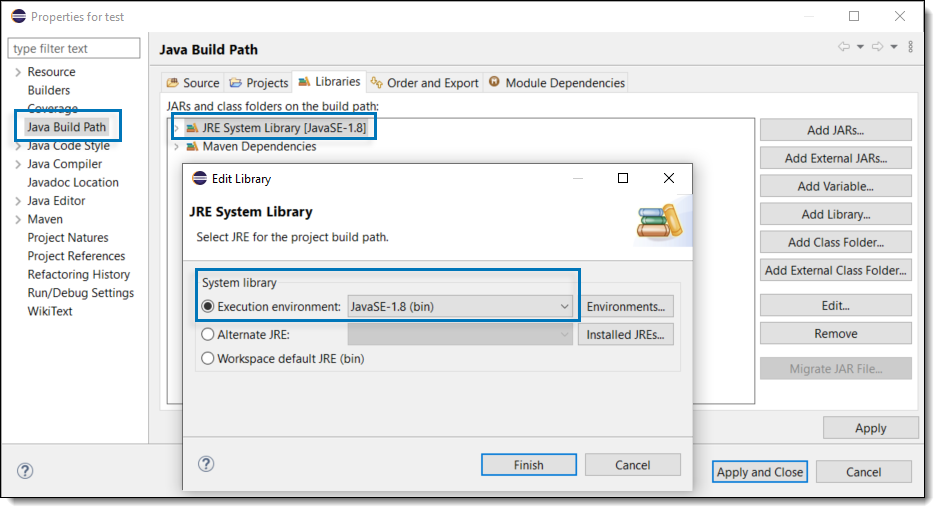
Click Java Build Path in the left index, then click Libraries tab in the right pane. Select JRE System Library and click Edit. The Edit Library window opens.
Note: If you notice that the JRE is unbound or see build path errors, refer Appendix A: Troubleshooting section to ensure the Java version is linked properly.
-
Select the Java version you have installed in your machine.
-
Click Finish.
-
Click Apply and Close.
Setup Credentials
After verifying the Java version and its proper linking in Eclipse IDE, open the scripts file and ensure that there are no errors.
To establish a connection, fill in the user, domain, locale, password, and server to setup your log in credentials.
Note: Your account will be temporarily locked for 3 minutes if you attempt to log in three (3) times within 60 seconds, regardless of whether the attempts are successful or unsuccessful.
Note: Contact your SS&C Eze client service representative for any issues related to login.
Running the Script
To run the script in Eclipse IDE:
-
Navigate to Package Explorer > test > scripts > right-click *.java > Run As > 3 Maven build…. The Edit Configuration window opens, as shown below.
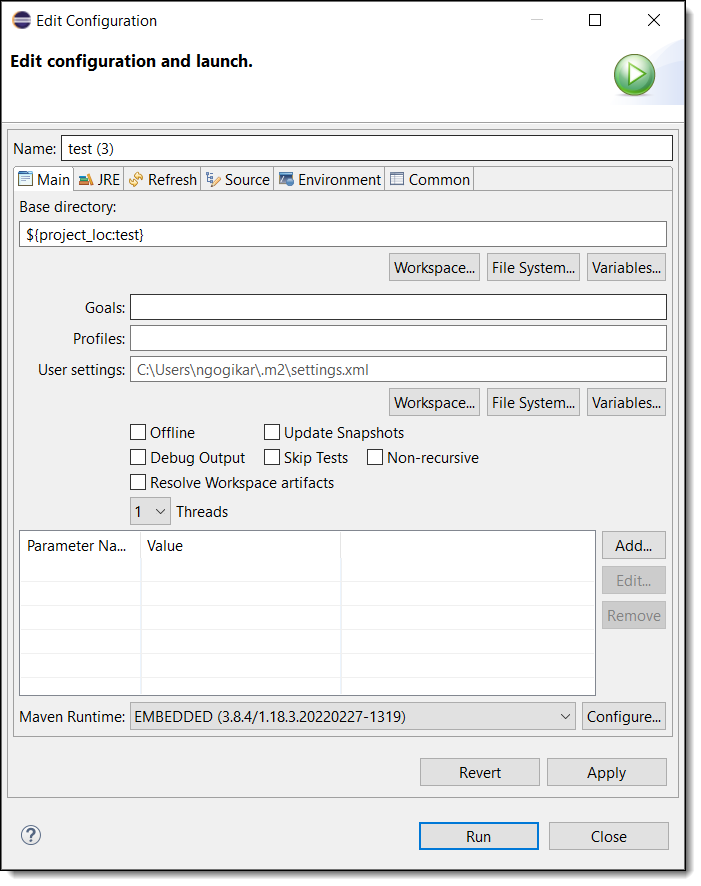
-
Enter compile in the Goals field.
-
Click Run.